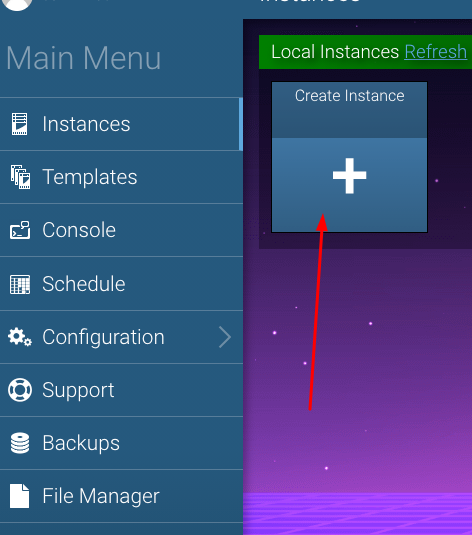
2. Click on the Create Instance button in the middle.
3. From the drop-down menu, choose wanted Minecraft Edition and hit the Create Instance button. If you are playing Minecraft on a personal computer/laptop, choose Minecraft Java Edition. If you want to play Minecraft on a smartphone, choose Minecraft Bedrock Edition.
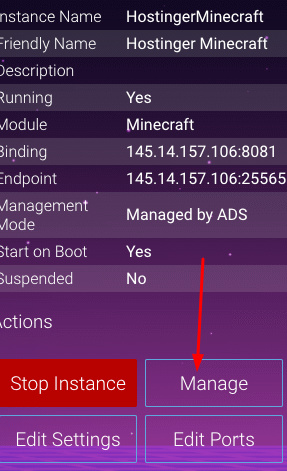
4. Allow a few minutes for the server to be setup up (you will see the loading icon in the right-hand corner) and then click on the Manage instance button
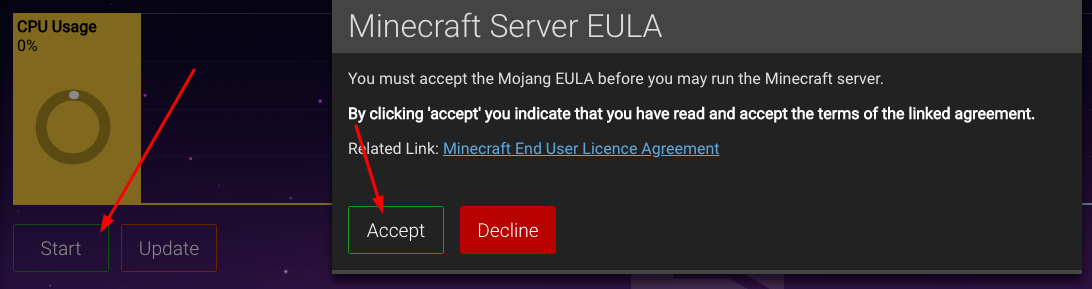
5. Click on the Start button and accept Minecraft Server EULA. After that, the newest Minecraft server will be downloaded (you will see the loading icon in the right-hand corner). Click the Start button one more time when updating to the latest version finishes.
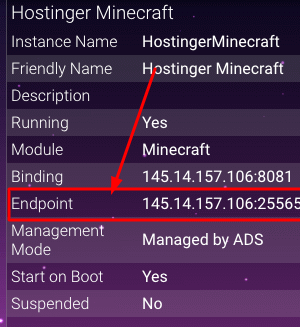
6. Connect to your Minecraft server using information from Instance Endpoint information.
Server configuration tips.
In order to edit Minecraft server settings such as (Difficulty, Game Mode, Spawn Monsters, Spawn NPC, Server Type (Official, CraftBukkit, Spigot, Paper, Forge, etc) navigate to Configuration >> Minecraft section. After the adjustments, restart your Minecraft server.
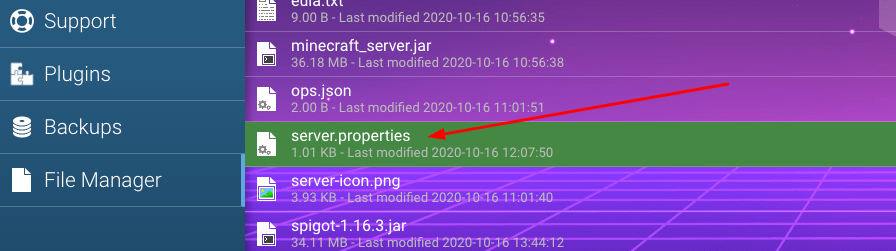
Editing hidden Minecraft settings (server.properties file)
Online Mode - If you wish to run your Minecraft server with cracked (non-official) Minecraft launchers. Change you will have to access your server.properties file in Config Files option and change the online mode to disabled (false)
True - Allows players to connect to the server only if they are using the official Minecraft launcher.
False - Allows players to connect with cracked (non-official) Minecraft launchers.
In order to edit this and other hidden settings, click on the Manage button for your Minecraft server instance, and on the left side click on File Manager button. Double click on server.properties file and the Text Editor window will be opened. Change the file, click on the Save button, and restart your server.
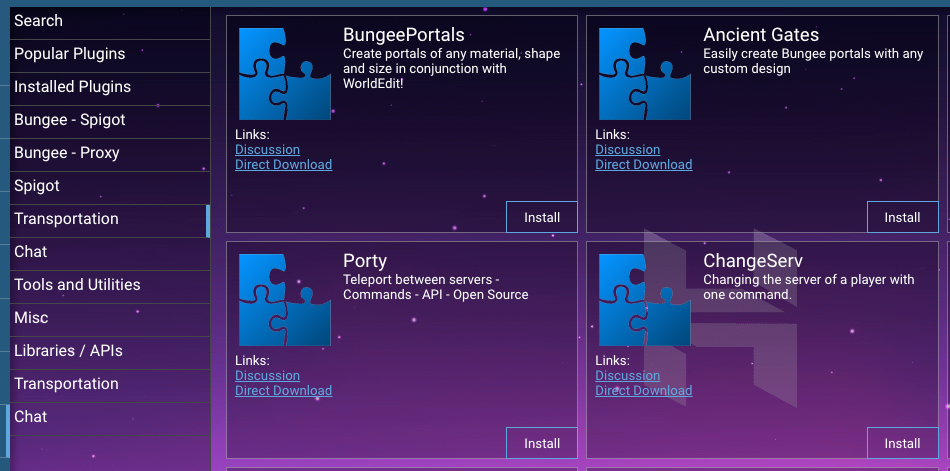
Installing Minecraft server plugins
In order to install Minecraft plugins, click on the Manage button for your Minecraft server instance, and on the left side click on the Plugins button. Find the desired plugin and click on the Install button.
Assigning more RAM to Minecraft server
In order to assign more RAM to the Minecraft server, navigate to Configuration >> Java section and change the value in Memory Limit (MB) field. The Default value is 1024MB.
We recommend always leave at least 512MB free RAM for server to work without any problems.
In case you have a server with 3GB RAM, the maximum recommended value for the Java Memory Limit (MB) field would be 2560 MB.
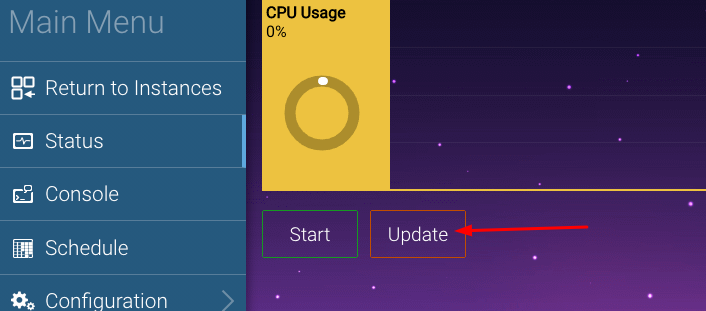
Updating Minecraft Server
If you are getting an error while connecting to your server, such as:
Outdated server! I'm still on 1.16.2
In order to update your Minecraft server to the latest version if needed, navigate the Minecraft instance by clicking the Manage button. Stop the server and click on the Update button.
Game Launchers
Unofficial Minecraft launcher - https://tlauncher.org/en/
Pocket Mine Launcher - https://tlauncher.org/en/pe.html